One of the pieces I have been working on recently is a cylinder roll top desk built in the Eastlake style around 1890. The piece is American, and uses Walnut lumber and veneers throughout the case. the secondary woods used are Cherry in the cubby holes on the interior of the desk, and a mix of Poplar and American Chestnut throughout the case. This piece is very similar in style to a desk that I worked on about a year ago. Her is the link to that piece:
http://johnmarkpower.blogspot.com/2010/05/walnut-eastlake-cylinder-secretary-desk.htmlThe first and most noticeable difference is that the desk I worked on previously has a glass front cabinet above the cylinder, where the current desk has a shelf. One of several other differences is that the current disk is smaller in proportion. If you notice, I dated the current desk slightly later than the first desk. The reason for this is that the desk I am now working on employs the use of machine made dovetails on the drawer as well as a joint called a sliding keyhole joint or a "french" dovetail. Both of these joints made there debut on the furniture market around 1890. Immediately Prior to this most pieces used what is called a Knapp joint. A history of the Knapp joint can be found in the following link:
http://johnmarkpower.blogspot.com/2010/05/knapp-joint.htmlThe desk I worked on previously had this type of joinery, which was used as early as 1870. With this information, I was able to identify this current desk as being made around 1890 because of its use of machine made dovetails. In fact, this was one of the very first machined dovetails made. What is impressive to me is how well these dovetails look and also how strong the joinery is.
One other note, if you are interested in looking at other examples of Eastlake style and a little history on the Eastlake Movement in Furniture, feel free to click on the Eastlake label on the right hand side of the screen.
Overall this desk was in decent shape, but it had several repairs that were necessary and also a very dirty finish. The finish beneath the dirt was in pretty good shape so I decided to restore the finish instead of removing it. Below is a photo of the desk as it came to me. The door on the right hand side is off of it's hinges.

The next two photos show the joinery used in the two drawers. The large drawer in the bottom section of the case uses the machine made dovetail and can be seen below.

The smaller drawer in the cubby section of the desk uses the sliding keyhole or French dovetail. This is a simple joint made using a table saw and is a good one for a small drawer such as this.

The case was loose in several places. The next two photos below show the top desk section being glued. This piece sits on top of the lower section and is held in place by dowels.


On the gallery section of the desk section, the board that creates the back section had cracked open. the next photo shows the crack being glued up.

One of the doors had a crack in one of it's stiles which was loose.The next two photos show the door being glued.


The cubby section of the desk was also loose. This photo shows it being glued.

The writing surface for the desk pulls out along a rabbited track. the rabbited groove in the lid had broken on one side sometime ago. This prevented the writing surface from pulling in and out easily. The photo below shows the broken portion on the underside of the surface being repaired with new wood.

This next photo shows the lower case being glued.

The desk surface was missing some appliques o the top of the desk, so I needed to turn two new ones. Luckily, I had several that were intact to go by. Below are two photos showing this process on the lathe and the finished product.


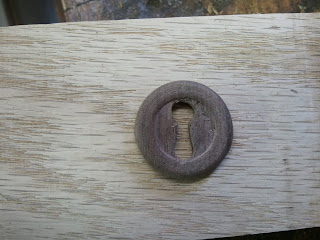
Likewise, one of the doors was missing it's escutcheon. I used the existing escutcheon on the desk lid as a template and made a replica. Below is a photo of the new escutcheon being turned, and then the finished escutcheon after the key hole was filed. The last two photos show the new escutcheon in place on the door. My next post will show the finished piece.
The turned escutcheon.

The escutcheon after the key hole was filed.


 The next two photos show some of the scratches on the top.

 As mentioned above, the joinery was quite loose. I removed the leg assembly from the case and knocked it apart to scrape the old glue. I found that one of the legs had a previous repair that was poorly done. I removed the previous repair to the leg and fitted it with new dowels where the old ones had been removed. I then glued the leg assembly and re-attached it to the case. Below are a few photos of this process.
 More loose joinery including some missing dowels.( they had been replaced by a drywall screw and a couple of nails!)
 A photo of some broken joinery.
 After the screw and nails were replaced with proper dowels, the whole assembly was re-attached to the case.
 The next post will deal with the application of the new finish.


