Welcome to my blog which follows my furniture restoration business. Please feel free to comment at the bottom of the post, and if you would like a response please leave your email address. you can also contact me directly at info@johnmarkpower.com. And by all means, if you like something please feel free to share it.
Showing posts with label Neoclassical. Show all posts

Saturday, February 7, 2015

X- Frame, or Campeche Chair (ca.1820)


The completed Chair
Strictly speaking, this is not a Campeche chair. The Campeche chair is a type of chair popular in the plantations of the south and was made in Mexico and in the southern United States in the 18th and early 19th century. The name comes from Campeche, Mexico, a state bordering Yucatan in southeast Mexico. The form is believed to have originated there.

While these chairs were being made there, Europe saw the emergence of what the English refer to as a X-Frame Chair. This name comes from the X shaped base of the chair that can be seen from the side. The X-frame design is a twist on The Curule chair, an form first seen in Ancient Rome and later to reemerge as part of the neoclassical period of European furniture history. In the Curule chair, the X-Frame that makes its design is seen from the front of the chair.

The design for the X-Frame chair is so similar to it's Central American cousin, that all of these chairs are commonly referred to as Campeche chairs. What ever you want to call it, this chair is very rare and of all of the examples I looked at in researching this post, it is the finest.

The primary wood used in the frame is West Indies mahogany (see my last post) and the entire frame is inlayed with sand-shaded satinwood. The curvilinear design is very much in keeping with the neoclassical ascetic (for comparison, see my last post) and the workmanship throughout was outstanding.

The joinery on one of the legs as well as one of the arms had loosened and I cleaned and glued the joinery in my shop. Other then that, I cleaned and waxed the existing finish on the chair. Because of the work done on the chair, I chose not to photograph the repairs, but chose to focus instead on the completed photos. This is quite a rare chair and I wonder if I will ever see another like it come through my shop!


Late Classical Mahogany Rocker (ca.1840)

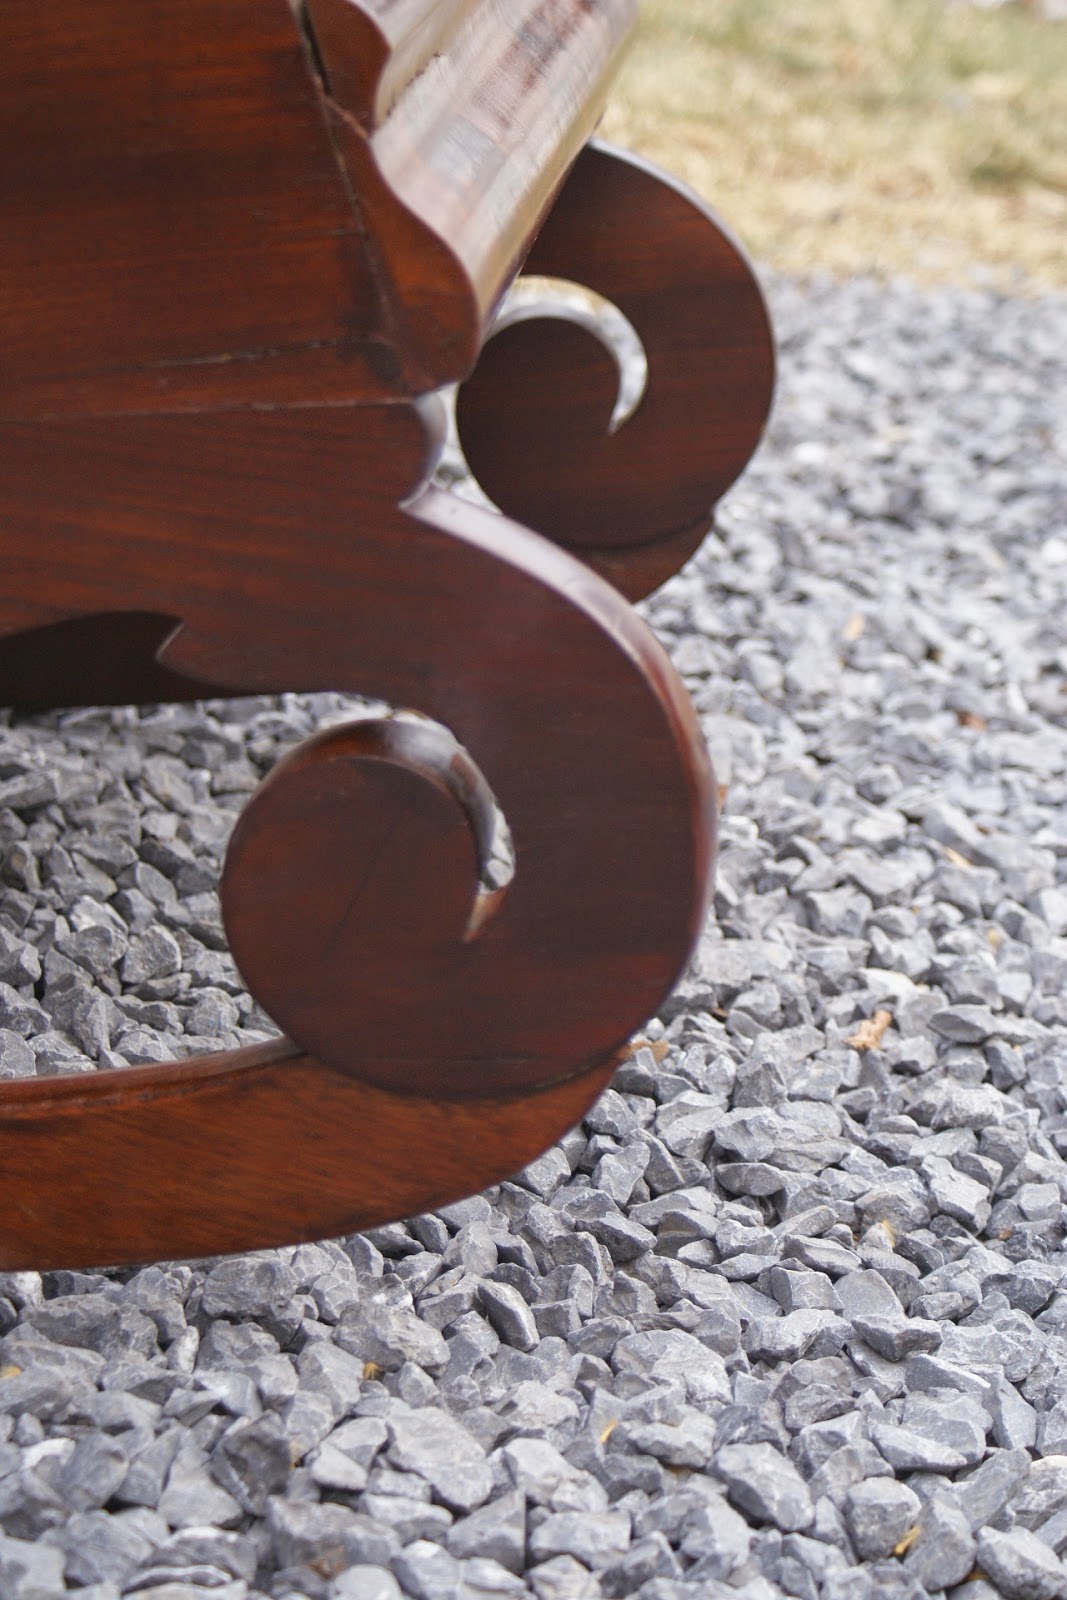
The Completed Rocker
What is good mahogany? What do people mean when they say "This is good mahogany, or that piece has fine mahogany in it"?

The answer  to these questions could fill up a book, in fact it did. Mahogany: The Costs of Luxury in Early America by Jennifer L. Anderson traces the United States love of this wood through the 18th century and well into the 19th. It is a comprehensive look at how we used and abused this wood to the point where it is in some cases in a state of commercial extinction. If you have any interest in the subject, I highly recommend this book.

In and attempt to answer the question a little more quickly, The two main types of mahogany used in the production of fine furniture are Honduran Mahogany (swietenia macrophylla) and West Indies Mahogany (swietenia mahogani) Both are fine woods and can be polished to a nice shine, but latter is what people refer to as good mahogany.
Swietenia Mahogani is found throughout the Caribbean region and when originally harvested, differences in the micro climates where the timbers grew gave the wood different characteristics, giving rise to many different names, including Haitian mahogany, Cuban mahogany, Santo Domingo mahogany, Jamaican mahogany etc. While all of these woods had different characteristics they were all swietenia mahogani. Distinguishing what wood came from where these days is difficult so the name of West Indies mahogany has been adopted when referring to swietenia mahogani.

 Swietenia macrophylla, or Honduran Mahogany is found in a much larger geographical area including much of Central America. The trees are bigger and produce quality lumber that is still being produced today. 

In the 18th and 19th century, it was common for cabinetmakers to use both woods in a single piece of furniture, usually reserving the West Indies mahogany for the showier places like drawer fronts, while the sides of a case for a chest of drawers might be made of Honduran Mahogany. Each piece of furniture was different, but when it was available, West Indies mahogany was generally preferred.

Today, Honduran Mahogany is the only true mahogany commercially available. The only West Indies mahogany available is old stock or pieces reclaimed from furniture and architectural pieces. When possible, I use reclaimed West Indies mahogany to make repairs, but when the repairs are substantial, I use Honduran and apply stain and touch up to blend the repairs into the existing wood.

In the case of the rocking chair, the majority of the chair was made from exquisite West Indies mahogany. One of the rockers was broken and in need of repair, involving the use of bridging patches to span a very broken component. 

In order to make room for the patch, I need to remove some of the wood around the broken area. I used a router to do this. Even though it is a small amount of wood, I always lament the fact that I am pulverizing a wood that is no longer available. I try to keep these repairs to a minimum and only do what is necessary.

When I routed the wood, I was left with a pile of shavings of West Indies mahogany. Below is a photo of those shavings next to a piece of Honduran mahogany used for patching.

The first thing to notice is the color difference, The West Indies mahogany being a rich dark color, while the natural Honduran mahogany is much lighter. If the shavings were one piece of wood, you would also see that the grain is much, much tighter and the wood resembles cherry more than Honduran mahogany in some cases. The result is a wood with unbelievable natural color and and compact grain which lends itself to a high polish.

Below is a photo of the completed repair I spoke of above. You can clearly see the color difference here.
As far as the rocker is concerned, Once the repairs were made I cleaned the existing finish and polished it with Dewaxed Shellac. It did not take many coats to bring the finish to a high polish. All of the repairs were touched up and the chair was eventually waxed. The result of the restoration showed off the beauty of this wood. No stain was used on the rocker originally  and the only staining I did was to blend in the areas I touched up, as seen in the photo below of the same repaired area.

Below are a few photos of the the restored finish. The embroidered upholstery was old but not original. This piece is a stunning example of  a late classical rocker made probably in a city center like New York or Philadelphia. To me, the most stunning aspect was the fine mahogany used to execute the design of this chair. A most remarkable wood the likes of which we will never see again!


Monday, February 18, 2013

New York Federal Scroll Back Arm Chair (ca. 1820)

The Completed Chair
A recent restoration project was an arm chair made in New York City circa 1820. This chair was made during the Federal period of American furniture manufacturing which is part of the larger Neoclassical period. This style of chair is known as a scroll back chair and is closely related to the Klismos chair, both taking design elements from classical Greek furniture forms. This particular chair was most likely made by a Scottish Cabinetmaker who immigrated to New York some time in the early 19th century. According to the current owner, the chair was owned by Andrew Mitchell, another Scottish immigrant. The current owner, Mr. Andrew Trotter, provided the following information about Mr. Mitchell:

"This chair is known in my family as the “Mitchell chair,” after Andrew Mitchell (1753-1836), a prominent merchant in New York City. It was passed down in my family along with Mitchell's Bible and other family documents. Andrew Mitchell was born in Gallowayshire, Scotland, and emigrated to New York in his 20s, according to family and official records. In the American War of Independence, he was a Loyalist and served in a militia unit defending the King. He witnessed the Battle of Bunker Hill and later was captured and imprisoned for six months on Long Island, N.Y., but was released and made his way to British-controlled New York."

Mr. Trotter also provided this detail photo from the front cover of Mitchell's Bible:


In researching this chair, I came across a book entitled "Scottish Cabinetmakers in Federal New York" by Mary Ann Apicella. In this book, Ms. Apicella details the wave of Scottish immigrant cabinetmakers who landed on the shores of New York City bringing with them their vernacular interpretations on Neoclassical furniture forms. Once here, these Scottish design elements were quickly incorporated into Federal New York furniture making and the result was a distinguishable sub form of Federal Furniture. Ms. Apicella uses the book to record this history as well as compare Scottish and American furniture forms to help identify and characterize the furniture made by these immigrants.

In the section of her book that deals with chairs, Ms. Apicella points out certain characteristics that were seen on these New York scroll back chairs that point towards their being made by Scottish hands. Most notably among these were the use of a carved central splat. The central splat which sits mid-way up the back of the chair and spans the space between the rear posts, was carved in a variety of motifs, including eagles, cornicopias, and lyres. Often, these chairs were also seen with a carved splat without a main motif, as is the case with the Mitchell chair. Ms. Apicella points out that this was a characteristic that is exclusive to Scottish design. English chairs often had a central carved splat of a twisted rope or often would use Boulle work as ornamentation. For an example of Boulle work, You can view my earlier post on a Regency Sofa here:


Another design element that Ms. Apicella points out as  being Scottish is the way the crest rail is framed with beading. Inside of the beaded frame is a piece of crotch Mahogany veneer. Mr. Mitchell's chair exibits this feature as well. So why is this not a Scottish chair?

The design element I spoke of above evolved from Scottish design elements and particularly the carving of the central splat, while evolving from Scottish design ideas, is more closely related to that of chairs made in New York by Scottish immigrants. The woods used are another clue. The chairs of this sort made in Federal New York were made almost exclusively out of Mahogany. The Mahogany used as a primary wood in this chair is West Indies Mahogany and is very tight grained, making it an excellent wood for carving. Because of it's fine grain and stoutness, fine detail was achieved in the carving and turnings on the chair. In addition to this, the stoutness of the timber made an excellent choice for a chair with curves in its individual components. A more open grained wood would have been less structurally suited to this type of construction and more apt to break along the grain. By selecting this wood, the cabinetmaker was able to provide a functional chair that also met the design expectations of the day.

The secondary wood seen on the front stretcher is American Ash. This wood was used commonly on these chairs as a secondary wood. While it is possible that a chair could have been made in Scotland using these woods, It is far more likely that another wood, like Beech, would have been used as a secondary wood. The use of Laburnum as a primary wood was also commonly seen on chairs of this type in Scotland.

By looking at the overall design, the carving motifs, and the woods used, I believe that this chair was made in Fereral New York, by a Scottish cabinet maker recently landed on American shores. Beyond that, attribution is difficult. One possible way to find attribution would be to make a tracing of the leg pattern and compare it to attributed examples. Perhaps a template was used more than once and a common shape can be found. Regardless of attribution, one thing is certain. This is a finely executed example of a New York federal scroll back chair that was made with great skill and effort. Below are a few photos of the chair as it came to my shop, some detailing the individual components I spoke of earlier, followed by photos of the restoration.

 These first two photos show the chair from different angles. The left arm had been broken off and the joinery in the seat frame had loosened up over time.

 
  These next two photos show the detail of the carved central splat. The design uses carved C-scrolls mixed with foliage. It interesting to speculate that perhaps this chair was made to order, and that Mitchell, being a loyalist in the revolution, would have turned down an eagle or cornucopia motif, both pointing towards the prosperity and strength of the new nation. This is only speculation, but it is a curiosity in light of the chair's history.

 
This photo details the crest rail which displays a piece of crotch Mahogany veneer framed by cock beading. According to Apicella, this design element is a Scottish innovation.
Of added interest were the turned applied discs or buttons that are seen on the termination of the arms and the rear posts. this is lesser seen feature among examples of Federal arm chairs I have viewed, and it certainly completed the design of the chair. The buttons can be seen in the two photos below. The first shows the arm and the second a detail of the rear post.

This photo shows the front seat stretcher. The stretcher is Ash. A piece of molded Mahogany is applied to the front and when the upholstered seat frame is attached, the Ash is concealed. The seat frame for this chair was also made from Ash and appeared to be original, although the upholstery was not.
As stated above, the left arm had broken off of the chair as had the post which supports the arm .In the photo below you can see the mortise in the left seat stretcher. The interior shoulder had broken off with the front post when it broke off.
To ensure proper alignment of all of the broken sections, the gluing was done in stages. In this photo the joinery on the seat and back are being tightened and various small parts are being glued in place.
 
While that was drying the various broken parts were reconnected to the front post, as seen in the photo below.
There were two missing portions that needed to be patched. To do this I used tight grained Honduran Mahogany. The color was different than the dark West Indies Mahogany, but the grain matched nicely, and the color was addressed later by using stain. Below is one of the patches rough carved in place.
On curiosity was the use of a double tenon in the joinery that connects the arm and the front post. Typically, the tenon would be integral to the post and the mortice would be in the arm. In this case, both components had mortises and a double or floating tenon was fashioned. At first I thought this a repair, but upon closer inspection found that the tenon was made from Ash and appeared to be part of the original construction. Why this was done is a mystery. Perhaps the piece used for the post was not quite long enough to include an integral tenon, or perhaps this was done to add strength to the joint. It is hard to say, but seeing as how the arm broke here, I doubt the tenon was added to strengthen the joint! Here is a photo of the floating tenon.
These next two photos were taken during the finishing process, after all of the repairs were made.

These last few photos show the completed restoration of the chair. The original finish was maintained in this restoration and the results were quite nice. The last photo shows the chair fitted with its seat. The seat has a needlepoint that I think will be recovered by the customer at a later date.


Sunday, January 27, 2013

Regency Rosewood And Beech Sofa (ca.1820)

The Completed Sofa
A recent piece that I restored was an English sofa made during the Regency period. The sofa was made primarily of Beech and had Brazilian Rosewood veneer inlayed with brass in a process known as Boulle work, named after a French cabinetmaker named Andre Charles Boulle (1642-1732) who specialized in Marquetry and invented the process. The process employed in Boulle work is to layer a sacraficial piece of veneer with a piece of the primary veneer being used and a sheet of contrasting veneer or metal. On top of these layers an image is applied. Using a fine saw, the layers are simultaneously cut through producing a piece of veneer with a positive and negative image as well as a piece of metal or contrasting veneer with a positive and negative image. The image itself is sacrificed in the process and the sacrificial veneer is used to keep the valued veneer from splintering with the force of the saw.  The cabinetmaker is then free to use the veneer as the image and the metal as the groundwork or to use the metal for the image and the veneer for the ground. In fact, pieces can be seen where one image is on the front of the piece and the reverse is on the opposite side. The difference between this and marquetry is that with marquetry, each piece is cut individually to create the image.

During the time when this technique was first developed, examples were seen in silver and tortoise shell. The silver was sometimes also engraved. For most of the 18th century, this practice was out of favor, but it came back into use in the early 19th century in England and can be seen on pieces made during the Regency period. In most of these pieces from the Regency period, brass and Rosewood are used. This is commonly seen in sofas as well as occasional tables and chairs. 

Most of the front facade of the sofa I worked on was covered in Boulle work. Where it was not covered, The primary wood (Beech) was stained and fauxed with India ink to simulate Rosewood. In addition to all of this, the feet were capped with cast brass casters that were extremely ornate and echoed the design of the Boulle work. Below is a photo of the sofa when it entered my shop.    
 The central image on the veneer is seen in the photo below. This was seen in four separate places on the sofa and was probably made all at once. The image is a stylized plant growing around and out of an Urn. The urn is a commonly used symbol in neoclassical furniture forms.

 While walking through a friends garden, I realized that the plant in question was a Poppy plant. Once I looked at the image closely, I could see the seed pod in the center of the image flanked by the serrated leaves. Below is a close up of the seed pod followed by some poppy plants showing their seed pods and serrated leaves.

 
 The piece had some veneer loss as well as some missing brass. In addition to this, the finish was in really rough shape and the joinery in the back and in the feet was loose. One other major problem was that the brass casters had completely seized with corrosion. Below is a close up of one of the casters and the brass inlay held in place with some string.
This photo shows a veneered board that was applied to the skirt of the sofa completely dislodged from the sofa.
The next two photos show some of the brass lifted from the leg.

The many photos that follow show the process of checking for loose veneer or brass, lifting it to clean the old glue beneath it, and clamping it back in place with new hide glue. The hide glue takes about 24 hours to really dry, so there were many clamping sessions that went on for several days.


The photo below shows an area where the brass work was actually missing. The next photo shows that area cleaned of its old glue

On the opposite side of the image was the same piece that was missing in reverse. The piece was lifted so I was able to slide a piece of brass sheet below the original and, using an X-acto knife, trace the image onto the new brass. The image was then cut out and reversed and fit into the area that the brass was missing. The completed image is seen in the last photo. Apologies for the flipped photos in this section, but you get the idea!


This photo shows the brass work and veneer above  being glued in place.
The back of the sofa is a separate frame held in place at the bottom with tenons and at the top with screws. This is to allow the upholsterer to upholster the seat. The joinery on the back of the sofa was very loose. In the photo below you can see the back with each piece marked with blue tape to indicate the orientation and the position of each piece. The back was then disassembled, The glue was cleaned, and the back reassembled. This process is shown below.


Once the repair work was completed, I turned my attention to the finish. The finish was in bad shape and really needed to be stripped. The danger in this was that the Beech wood had been fauxed with India ink and I did not want to loose this. The finish was a shellac based finish and the solvent used was alcohol, so I used alcohol to slowly smooth out the original finish and reverse the damage done to the finish. The result was a finish that was very thin and needed new finish to be added to it. The other result was that the India ink was preserved. One other piece that came out of this was that the finish was removed from the brass and the brass was brightened to contrast the Rosewood. From there it was just a matter of coating the sofa with new finish and waxing it. Here are a few images of  the restored finish before the sofa was sent to the upholsterer.


Below are some photos of the sofa back from the upholsterer. The fabric was gold in color and picked up on the brass quite well. The upholsterer also made Bolster cushions for the sofa, seen in the last photo. The result was a stunning sofa that in my opinion was really worth the effort put into it.