Welcome to my blog which follows my furniture restoration business. Please feel free to comment at the bottom of the post, and if you would like a response please leave your email address. you can also contact me directly at info@johnmarkpower.com. And by all means, if you like something please feel free to share it.

Thursday, February 19, 2015

National Oak Roll Top Desk (1917)

The Completed desk
One of our recent restoration projects was an oak roll top desk made in 1917 by National Desks. Presumably, this is the same company as the National Furniture Company of Mt. Airy, N.C. I found no reference to a National Desk Company but when I researched National Furniture Company Roll Top Desks I found several examples of similar roll top desks. In each case the general design was identical but the details like the hardware and the arrangement of the cubbies were different. Without being exactly sure of the manufacturer, I am certain of the date of manufacture and the subsequent retailer. 

The desk was labeled in different places in different ways. The most prominent label is a plate on the interior one of the drawers. The label said Clark & Gibby, NY. At first I thought that this was the manufacturer but we later found stamped on the top of a drawer front "National Desks" as seen below:

I believe that National Desks, or more likely the National Furniture Company, was the manufacturer and Clark and Gibby was the retailer. After removing the interior cubbies to make repairs, we found this label:

The label shows the style and model number,indicating that a specific model had options that would be contained in a particular style. Also in the lower left hand corner is a completion date of 1917. This would have been used in the manufacturing process and not meant to be seen by the public, but it is always nice to find something like this because it pinpoints a date.

The roll top desk as a form developed in the second half of the 19th century. It's immediate predecessor was the cylinder desk which worked the same way but had a solid quarter cylinder for a lid. Here is a photo of one of these I restored and the links to those posts concerning its restoration:


As you can see, the"cylinder" part was solid and veneered with walnut. The roll top desk differed in that the lid was comprised of many half round slats adhered to a sheet of canvas. These slats would move in a a track in a similar fashion as the solid lid, but because they were separate, this made them more flexible. This allowed desk lids to take shapes or follow tracks that did not move in a fixed arc. What followed were lids with ogee profiles (probably the most famous) like this one:


 As the from developed there were a lot of designs, but in the beginning of the 20th century, a larger desk came on the market with a roll top that followed a single curve. At the time, it was labeled a modern roll top desk. The desk I worked on falls into this category. Below are a few photos from around 1917 showing the large "modern" roll top desk in use:


The desk had a lot of wear and tear and also many mechanical issues. The finish was in a restorable condition so we concentrated first on the repairs. 

The veneer along the sides had loosened and then chipped away over time leaving this:


New oak veneer patches were cut to patch the missing portions as seen below:


The case was generally loose and needed to be tightened. That process can be seen in the next photo. Besides that here was lost of "nuts and bolts" repairs, like replacing missing stop blocks, building up drawer bottoms, stabilizing interior runners, etc.


After all of the repairs were made, the finish was cleaned and restored using shellac. The finish was faded in several places so stained the desk selectively, as well as touching up the patches. I also made keys for the locks and generally made sure everything was working well. The completed roll top desk can be seen in the photos below.


Saturday, February 7, 2015

X- Frame, or Campeche Chair (ca.1820)


The completed Chair
Strictly speaking, this is not a Campeche chair. The Campeche chair is a type of chair popular in the plantations of the south and was made in Mexico and in the southern United States in the 18th and early 19th century. The name comes from Campeche, Mexico, a state bordering Yucatan in southeast Mexico. The form is believed to have originated there.

While these chairs were being made there, Europe saw the emergence of what the English refer to as a X-Frame Chair. This name comes from the X shaped base of the chair that can be seen from the side. The X-frame design is a twist on The Curule chair, an form first seen in Ancient Rome and later to reemerge as part of the neoclassical period of European furniture history. In the Curule chair, the X-Frame that makes its design is seen from the front of the chair.

The design for the X-Frame chair is so similar to it's Central American cousin, that all of these chairs are commonly referred to as Campeche chairs. What ever you want to call it, this chair is very rare and of all of the examples I looked at in researching this post, it is the finest.

The primary wood used in the frame is West Indies mahogany (see my last post) and the entire frame is inlayed with sand-shaded satinwood. The curvilinear design is very much in keeping with the neoclassical ascetic (for comparison, see my last post) and the workmanship throughout was outstanding.

The joinery on one of the legs as well as one of the arms had loosened and I cleaned and glued the joinery in my shop. Other then that, I cleaned and waxed the existing finish on the chair. Because of the work done on the chair, I chose not to photograph the repairs, but chose to focus instead on the completed photos. This is quite a rare chair and I wonder if I will ever see another like it come through my shop!


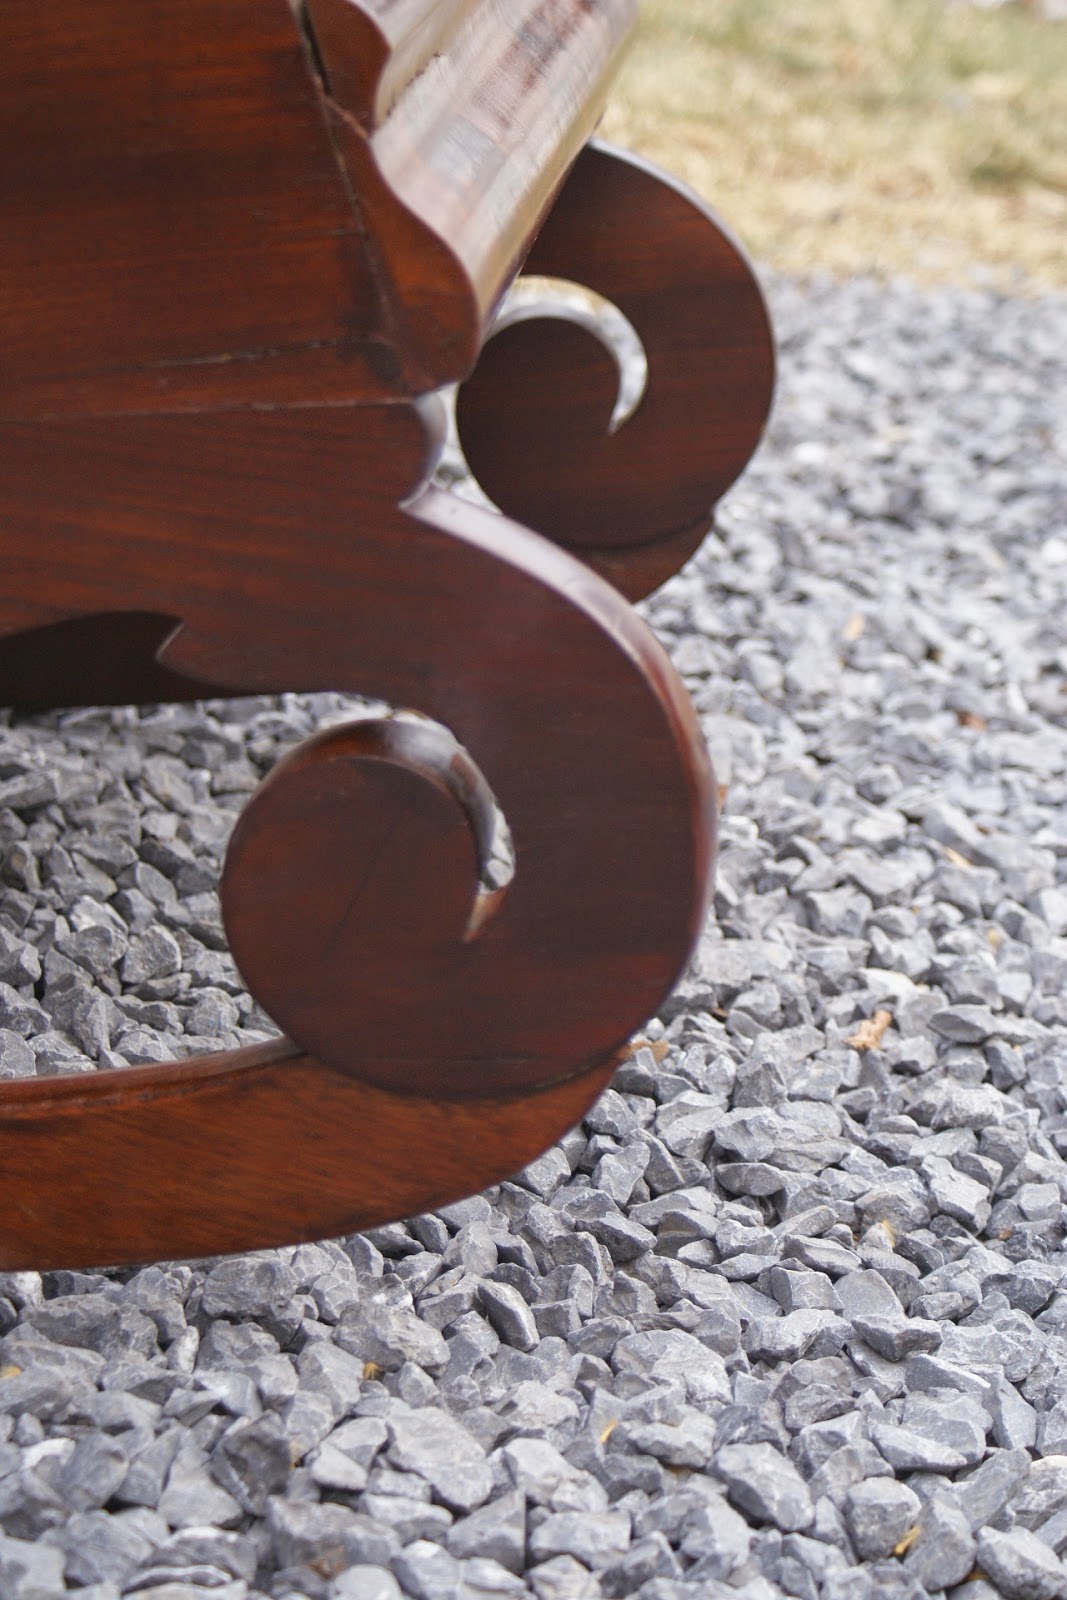
Late Classical Mahogany Rocker (ca.1840)

The Completed Rocker
What is good mahogany? What do people mean when they say "This is good mahogany, or that piece has fine mahogany in it"?

The answer  to these questions could fill up a book, in fact it did. Mahogany: The Costs of Luxury in Early America by Jennifer L. Anderson traces the United States love of this wood through the 18th century and well into the 19th. It is a comprehensive look at how we used and abused this wood to the point where it is in some cases in a state of commercial extinction. If you have any interest in the subject, I highly recommend this book.

In and attempt to answer the question a little more quickly, The two main types of mahogany used in the production of fine furniture are Honduran Mahogany (swietenia macrophylla) and West Indies Mahogany (swietenia mahogani) Both are fine woods and can be polished to a nice shine, but latter is what people refer to as good mahogany.
Swietenia Mahogani is found throughout the Caribbean region and when originally harvested, differences in the micro climates where the timbers grew gave the wood different characteristics, giving rise to many different names, including Haitian mahogany, Cuban mahogany, Santo Domingo mahogany, Jamaican mahogany etc. While all of these woods had different characteristics they were all swietenia mahogani. Distinguishing what wood came from where these days is difficult so the name of West Indies mahogany has been adopted when referring to swietenia mahogani.

 Swietenia macrophylla, or Honduran Mahogany is found in a much larger geographical area including much of Central America. The trees are bigger and produce quality lumber that is still being produced today. 

In the 18th and 19th century, it was common for cabinetmakers to use both woods in a single piece of furniture, usually reserving the West Indies mahogany for the showier places like drawer fronts, while the sides of a case for a chest of drawers might be made of Honduran Mahogany. Each piece of furniture was different, but when it was available, West Indies mahogany was generally preferred.

Today, Honduran Mahogany is the only true mahogany commercially available. The only West Indies mahogany available is old stock or pieces reclaimed from furniture and architectural pieces. When possible, I use reclaimed West Indies mahogany to make repairs, but when the repairs are substantial, I use Honduran and apply stain and touch up to blend the repairs into the existing wood.

In the case of the rocking chair, the majority of the chair was made from exquisite West Indies mahogany. One of the rockers was broken and in need of repair, involving the use of bridging patches to span a very broken component. 

In order to make room for the patch, I need to remove some of the wood around the broken area. I used a router to do this. Even though it is a small amount of wood, I always lament the fact that I am pulverizing a wood that is no longer available. I try to keep these repairs to a minimum and only do what is necessary.

When I routed the wood, I was left with a pile of shavings of West Indies mahogany. Below is a photo of those shavings next to a piece of Honduran mahogany used for patching.

The first thing to notice is the color difference, The West Indies mahogany being a rich dark color, while the natural Honduran mahogany is much lighter. If the shavings were one piece of wood, you would also see that the grain is much, much tighter and the wood resembles cherry more than Honduran mahogany in some cases. The result is a wood with unbelievable natural color and and compact grain which lends itself to a high polish.

Below is a photo of the completed repair I spoke of above. You can clearly see the color difference here.
As far as the rocker is concerned, Once the repairs were made I cleaned the existing finish and polished it with Dewaxed Shellac. It did not take many coats to bring the finish to a high polish. All of the repairs were touched up and the chair was eventually waxed. The result of the restoration showed off the beauty of this wood. No stain was used on the rocker originally  and the only staining I did was to blend in the areas I touched up, as seen in the photo below of the same repaired area.

Below are a few photos of the the restored finish. The embroidered upholstery was old but not original. This piece is a stunning example of  a late classical rocker made probably in a city center like New York or Philadelphia. To me, the most stunning aspect was the fine mahogany used to execute the design of this chair. A most remarkable wood the likes of which we will never see again!


Tuesday, September 16, 2014

A Fantasy Vanity (Ca.1940)

The Completed Vanity


 Sometimes I am asked to do something out of the ordinary, something that pushes the limits a bit. Something that takes the same amount of concentration and steady hand to produce, but with very different results! This vanity was such a piece, and it was a lot of fun to refinish. 

The piece itself was from a larger bedroom set and was made sometime in the 20th century, I am guessing the 1940's but it could easily be earlier or later. The vanity was a factory made piece and had exquisite veneers. It seemed that almost every surface was covered with a different veneer, which made the piece lend itself to what the owner had in mind, which was to transform it into something out of a fairy tale or fantasy. This was achieved by using a variety of stains, mostly of solid colors like orange, yellow, blue and green. A bold change from the wood tones I usually work with like light walnut and light red mahogany. The result was a fantastic piece that accomplished its goal in every way. My feelings were confirmed the other day when a friend came into my shop, saw this vanity, and said " Wow, that is straight out of Alice in Wonderland!" 

Below are a few shots of the repairs meant mostly to show the piece before it was transformed.


 These next few photos are of the finished piece. the light carving incised into the drawers had a gold leaf paint brushed into them which really set the piece off. This was a fun project and the customer was happy with the results, which made me happy!


Cedar Lawn: Late Classical Bureau (Ca. 1820)


The Completed Bureau

This blog post concerns a piece I recently restored for an estate in Jefferson County, West Virginia called Cedar Lawn. If you are interested in viewing other pieces restored for this house, you can click on the label to the left that says "Cedar Lawn".
The piece in question is a bit of an oddity. It has all of the lines and construction details of a sideboard, but when the bottom doors are opened, they reveal an inner cabinet built in to the larger cabinet that houses a series of drawers. In addition, the two drawers above the drawers open to reveal a mirror (originally two, one in each drawer) that folds out and is adjustable. Behind the mirror are three little drawers built into the larger drawer. In front of the mirror are trays and one removable tray (again, there  were originally two trays, one for each drawer). It is as if someone walked into a cabinet shop and said, " I like that sideboard over there you are working on. Is there any way we can make it into a dresser/ dressing table?" 
In fact, something like this is what likely happened. If you look at the price books distributed in the early 19th century ( for an example click here: https://archive.org/details/cabinetmakerslo00unkngoog ) you will see that a piece of furniture was sold in its basic form. From there you could pick and choose features that suited your needs and the price would be raised accordingly. This cabinet was probably started with one idea in mind, and then customized to fit the needs of the particular customer who bought it. The inclusion of the separate inner cabinet that housed the drawers, held in place with screws, and finished with some molding around the edges, would suggest this. It would be easy to remove or install this inner cabinet, where, if the piece were intended originally to be used as a dresser, the drawer framework would be integral to the cabinet.

At least, this is one theory, and there is probably some validity to it. That being said, the early 19th century was a time of innovation and playing with forms. Below is a broadside showing the wares of Joseph Meeks & Sons, a prominent cabinet making firm from New York and competitors of Duncan Phyfe's cabinet making firm (not to mention the firm that built the bureau in question).

At first glance one can see the variety of pieces offered by Meeks & Sons, in the latest styles and fashions. What caught my eye is the piece second row from the bottom and to the far right. It is not visible in the image above, but the listing describes this item as a bureau. Bureau is one of those lovely terms in furniture that has a loose meaning. It can either refer to a desk or a dresser. If this were a desk, it was probably of the same kind as what we refer to as a butler's desk. If it were a dresser that "Bureau" was referring to in this ad, the layout would have been similar to the piece I worked on.

Because of this ambiguity, I thought that bureau would be a perfect way of describing this piece, which seems to be a mix of two forms. What I do know about the piece through inspection, was that it was made in a city center on the east coast some time in the first two decades of the 19th century. The piece could be Baltimore, but I am inclined to think it came from Philadelphia or New York. The inclusion of a white marble top might suggest one of these places because marble was used throughout the east coast on fine pieces, constructed near ports, during this time. The primary wood used in the piece is exquisite mahogany, both in veneer and solid form. The knobs are made of rosewood. The secondary woods used in the piece are poplar and pine. All of the timbers used were selected for their beauty as well as their stability, and as a result, two hundred years later there was minimal cracking and loose veneer/ joinery. This was a well made piece made by professional craftsman who did exquisite work. It is my belief that this piece was made by a cabinet making firm such as Meeks or Phyfe, somewhere on the east coast, and not by a sole cabinetmaker.

Even with such superior workmanship at hand, time took it's toll on this piece, and the damage was plentiful when I first saw it. Below is a photo of the piece as it came to me.
One of the big problems was that the rosewood knobs had broken off in places and one was missing entirely. Below is a photo of one such knob.
An interesting detail of construction was how the knobs were attached to the drawer fronts. The knob had an integral tenon that fit into a corresponding hole in the drawer front. Then a hole was drilled through the top edge of the drawer front straight down to and through the knob's tenon at a perpendicular angle to the knob. A long oak or ash dowel was then inserted in this hole locking the knobs in place. This detail is seen below where the top of the dowel is visible on the top edge of the drawer front.
This made removing the knobs challenging, but in the end we were able to remove them so they could be repaired, as seen in the photos below.
A nice block of rosewood was procured to repair the broken knobs and turn the new knob, as seen below.
Before getting into the repair of the knobs, I thought it might be interesting to detail how the knobs were made in the first place. Since I needed to make one, I took photos along the way.

The knobs were started between centers on the lathe with the grain running parallel to the bed of the lathe (as opposed to face grain knobs). I started with a square blank that fit the dimensions and turned it to a cylinder.

I next tuned the tenon on one end that would ultimately be inserted into the drawer front, as seen below.
The next step was to remove the blank from the between the centers and mount it in a chuck, so that the tenon was held while the other side could be worked.
From there the details of the knob were turned.

The finished product was stained and finished while still on the lathe.
After that, I turned to the repair of the original knobs. The first was missing the back side of the knob, where it meets the face of the drawer. The blank I  made to patch this had a hole drilled in it so I could slip it over the tenon and glue it to the knob.
This bank was then cut into an octagonal shape to reduce turning time, and the proper amount was cut on the band saw.
The knob itself was turned to match the diameter of the blank and the blank was glued to the knob as seen in the next two photos.

Once the glue had dried, I mounted the knob on the lathe and turned the blank to the appropriate profile, as seen in the next four photos.


This next knob had a similar issue, and it also needed part of the front of the knob turned. The repairs are seen in the next two photos.

This one was my favorite! Much of the knob was broken on the back side and a large blank was glued to the knob.
When the lathe was turned on, the silhouette of the original knob could be seen "through"  the spinning blank, as seen in the next photo.
By watching my tool and looking at the original profile, I was able to turn down to that original profile. This method was used throughout this process with the knobs and gave very accurate results.
Moving on to the case, there was a great deal of molding that was missing from the case. Most of this was what is called Astragal molding and consists of two flats with a hump in between them when viewed in cross section. To make replacement molding, I made what is called a scratch stock, which is a piece of metal (a section of a saw blade from a wood-mizer) with the profile of the molding cut into the metal. the metal is housed in an "L" shape holder and a bolt is run through the wood to compress the wood around the  metal and hold it in place. The shop made tool is seen below.
In the bow of the "L" shape is the protruding metal and cut into it is the hump part of the molding.
Once I got a blank to the proper thickness I clamped it to my joiner, as seen below.

By dragging the scratch stock over the wood at a perpendicular angle, I was able to produce the molding, as seen below. Once I was satisfied with the molding I would rip it from the stock on the table saw and with a bit of refinement I had replacement molding.
The second profile was seen around the inside panels of the doors. This was a bit more complicated and the profile can be seen below cut into the metal.
the same process was used to make the molding, as seen below.
The finished patch of molding, in the door and ready for finish and touch up.
this next piece shows the piece during the cleaning process. The yellowish haze on the drawer fronts is dried wax that had been separated by mineral spirits.
Some of the inner trays needed some repairs, as seen in the photos below.


One interesting repair was performed by Jesse, who works with me. The columns had deep dents in them from things banging against them through the years. One of the columns is seen below with the dents visible.
By applying steam to the dents the wood moved back out to where it had originally been. The steam was applied by using an iron and a wet rag. The watery rag was placed over the damaged area and the iron applied to that. after awhile the dents were nearly gone, as seen in the next photo.
The two upper drawers both had damage where the thrown locks had smashed into the case front breaking off bits of wood in that area. Below are some of Jesse's patches on the damaged case.


One of the interior draws needed a patch on the corner, and Jesse provided the work on this as well. The results are seen below.

these next few photos show various parts of the dresser during the finishing process.


These last photos show the completed bureau.